Back to School Sublimation – Sixth Grade: A Practical Design Asset for Creators and Entrepreneurs
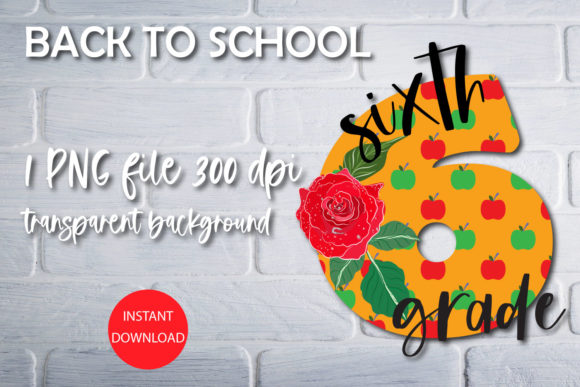
When preparing for the back-to-school season, one design file can serve as the foundation for dozens of projects. The Back to School Sublimation – Sixth Grade PNG file provides a high-resolution, transparent-background asset designed specifically for sublimation printing. At 12000px x 12000px and 300dpi, this single file offers the flexibility to scale, crop, and adapt without quality loss. For creators, small business owners, and educators, understanding how to integrate this type of asset into a repeatable workflow matters more than the file itself. This article walks through practical implementation, use cases, and long-term integration strategies so you can get consistent, professional results every time.
What the Asset Delivers and Why It Matters
The core offering is one PNG file with a transparent background, optimized for sublimation workflows. The resolution and dimensions mean you can print on large surfaces like tote bags, backpacks, or car decals, and also resize down for smaller items like pencils cases or mask prints without pixelation. The transparent background eliminates the need for manual masking, saving time during layout and design preparation. For a sixth-grade themed project, the asset typically includes grade-specific typography, school motifs, or year references that resonate with that age group.
In practical terms, this file fits into the preparation stage of any sublimation project. You do not need to create artwork from scratch. Instead, you import the PNG into your design software, combine it with other elements like student names or school colors, and export for printing. This reduces turnaround time and ensures consistency across multiple products.
Where This File Fits in a Broader Workflow
Sublimation projects follow a predictable sequence: concept, design preparation, transfer printing, pressing, and finishing. The Back to School Sublimation – Sixth Grade PNG is most useful in the design preparation and pressing setup stages. However, its role extends beyond a single project.
Before the Project: Planning and Asset Management
Before you start any design work, organize your digital assets. Save the PNG file in a dedicated folder for seasonal or grade-specific designs. Because the file has a transparent background, you can pre-build templates in your software (Canva, Adobe Illustrator, or Affinity Designer) that include this asset as a base layer. This preparation step lets you reuse the same file for different products by simply changing the background color, product mockup, or additional text overlays.
For small business owners selling on Etsy or at local craft fairs, planning a product line around one asset reduces design overhead. You can create a sixth-grade teacher gift bundle, a matching shirt and tote bag set, and a card design all from the same PNG. The key is to set up your file structure and naming conventions early so you can locate and reuse the asset quickly.
During the Project: Integration with Tools and Materials
When you open the PNG in your design software, check the resolution. At 12000px, you can safely scale down without resampling issues. If you need to add elements like a student name or school year, use a separate layer so the original asset remains editable. This non-destructive workflow means you can revert changes or create variations for different customers without duplicating the base file.
For sublimation printing specifically, the transparent background is essential. Sublimation paper works best when the ink transfers evenly, and a transparent PNG ensures no unwanted white or colored edges appear on the final print. You can place the design onto any colored garment or substrate—white, light gray, pastel, or even dark backgrounds if you use a white base layer. This flexibility allows you to expand your product range beyond standard white t-shirts to include notebooks, bags, masks, and home decor items.
After the Project: Quality Control and Long-Term Use
Once you create a final print file, compare the output against the original PNG. Watch for color shifts: sublimation inks often print slightly differently than what appears on screen. Use the high-resolution PNG as a reference to calibrate your printer settings or ICC profiles. If you notice consistency issues across multiple prints, return to the original file and adjust your workflow rather than reworking the design.
For long-term use, archive the original PNG with metadata—include the grade level, season, resolution, and any keywords like "sixth grade back to school sublimation." If you run the same promotion next year, you can pull the asset and update only the year or color palette. This approach builds a library of reusable assets that saves design hours over time.
Practical Implementation Tips for Different Use Cases
The Back to School Sublimation – Sixth Grade PNG works across multiple product categories. Each use case requires slight adjustments to the workflow, but the core asset remains the same.
Teacher Gifts and Classroom Decor
For a personalized teacher gift, open the PNG in your design editor and add a teacher's name or a short message like "Thank you for a great year." Print on a coffee mug, tote bag, or notebook cover. Because the file is large, you can crop specific elements—for example, isolate the "Sixth Grade" text or a graphic icon—and use those as standalone prints for smaller items like pencils boxes or bookmarks. This approach extends a single asset into multiple gift-ready products.
For home school decor, consider printing on canvas or composite panels. The transparent background lets you place the design over a custom background color that matches the room or curriculum theme. Use the same file to create matching wall art, desk mats, and binder covers for a cohesive look.
School Bags, Shirts, and Masks
Apparel and accessories require attention to placement. Measure the print area before scaling the PNG. For a standard school shirt, the design typically sits at chest level or center back. Use the transparent background to align the design precisely without visible edges. For masks, reduce the file size and test a small print first to ensure the design fits the fabric without distortion.
When printing on bags, consider the material texture. Smooth polyester or cotton blends produce crisp results, while textured fabrics may require a lower temperature or longer press time. The high-resolution PNG gives you latitude to adjust these variables without compromising image quality.
School Workbooks, Cards, and Labels
For printed paper products like workbooks, greeting cards, or labels, the transparent PNG allows you to layer it over patterned paper or branded stationery. In design software, place the PNG on top of a background or template, then export as a print-ready PDF. For workbooks, you can use the design on the cover, dividers, and spine. Consistency across the whole set reinforces the sixth-grade theme and creates a professional product.
If you sell digital products, the transparent PNG itself can be a component. Bundle it with coordinating patterns, fonts, or mockups as a complete back-to-school kit. This expands your offering from a single file to a resource that other creators can integrate into their own workflows.
Workflow Considerations for Efficiency and Quality Control
Integrating one high-resolution asset into a broader production process requires attention to a few key factors.
Preparation and Compatibility
Ensure your design software supports large PNG files with transparency. Most modern tools handle 12000px images, but older systems may lag. If you experience slowdowns, work with a scaled-down proxy version for layout and only apply the full-resolution file at export. Check your sublimation printer's driver settings: some software limits image dimensions during file import. If needed, split the design into multiple panels and reassemble on the transfer paper.
For color accuracy, convert the PNG to CMYK if your printer requires it, but note that sublimation typically uses RGB workflows. Keep a color profile test file handy and print a small sample before running a full batch. This step prevents material waste and ensures the design matches your client's expectations.
Organization and Reusability
Name the original PNG file with a clear, searchable convention. For example: "BTSS-Grade6-12000px-Transparent.png" alongside a compressed preview for reference. In your asset library, tag the file with categories like "grade-specific," "back-to-school," and "sublimation." If you collaborate with other designers or print partners, share the original file and a brief usage guide that outlines resolution limits, recommended materials, and common workflow steps.
Over time, you will accumulate multiple grade levels and seasonal assets. Build a folder structure by year and grade so you can quickly locate sixth-grade files for repeat orders or new projects. This system pays off during busy seasons when production speed matters most.
Consistency Across Multiple Projects
When using the same PNG for different products, maintain visual consistency by saving base templates. A template might include the PNG at a fixed position, a standard color overlay, and placeholder text layers. For a batch of teacher gifts, open the template, update the name and product mockup, and export. This workflow eliminates repeated positioning and scaling checks.
For quality control, keep a printed reference sample of the original design. Compare each new press against this sample to catch color drift, misalignment, or resolution issues early. If you outsource printing, provide the PNG file along with a printed proof so the production team understands the expected output.
Integrating the Asset into a Regular Routine
For creators who sell back-to-school products year after year, the Back to School Sublimation – Sixth Grade PNG becomes a repeatable component in an annual workflow. Set aside time each spring to archive, update, and prepare grade-specific assets. By August, you have a library of designs ready for customization. This approach removes the pressure of designing from scratch during peak order periods.
For educators and hobbyists, the asset serves a different role. Use it as a starting point for class projects, school fundraisers, or homeschool materials. Because the file is high resolution and transparent, you can involve students in the design process—let them choose background colors or add their names—while maintaining a professional base. The familiarity of a consistent design motif across classroom items builds a sense of community without requiring advanced design skills.
Ultimately, the value of a single PNG lies not in the file itself but in how consistently and creatively you integrate it into your existing routines. Whether you produce one custom mug or a full product line, the same preparation, organization, and quality control steps apply. By treating this asset as part of a larger workflow rather than a one-off graphic, you save time, reduce errors, and deliver better results to your customers, students, or clients.