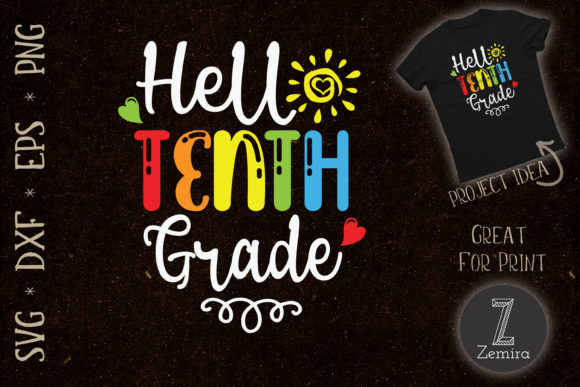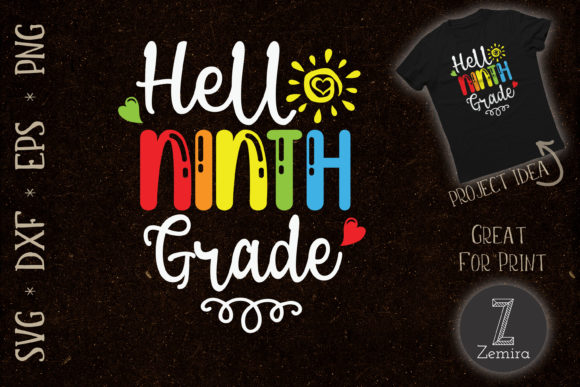
Hello Ninth Grade Back to School: A Practical Guide for Creators and Entrepreneurs
Every fall, families and educators gear up for the transition into high school, and ninth grade marks a significant milestone. For those who design, craft, or sell personalized merchandise, the demand for relevant, ready-to-use assets increases sharply. The Hello Ninth Grade Back to School design bundle provides a clean, customizable template in four industry-standard formats: SVG, DXF, EPS, and a high-resolution PNG. Instead of starting from scratch, you can integrate this asset directly into your production pipeline, whether you print on demand, cut vinyl, or create digital content. This article walks through how to incorporate the bundle into real workflows, from preparation through final output, and explains why these file types matter for consistency, scalability, and long-term reuse.
What the Hello Ninth Grade Back to School Bundle Contains and Why It Fits Your Process
The bundle includes four distinct file formats, each tailored for specific software and hardware environments. The SVG file works seamlessly with Cricut Design Space, the DXF file opens in Silhouette Studio (including the free basic edition), the EPS file is compatible with Adobe Illustrator and CorelDRAW, and the PNG offers a 300 DPI transparent background for raster-based projects. Having all four means you can move from vector editing to physical production without file conversion headaches. This is especially valuable for small business owners who manage multiple product lines—cutting vinyl decals on a Cricut, printing heat transfers on a sublimation printer, or uploading designs to a print-on-demand platform like Printful or Redbubble.
The design itself focuses on the phrase “Hello Ninth Grade Back to School,” making it immediately relevant for back-to-school campaigns. Because it is a vector file, you can scale it to any size without losing sharpness, which is crucial when printing on items as small as a key holder or as large as a tote bag. The PNG, at 300 DPI, ensures clean reproduction on mugs, cushions, and cards where raster detail matters.
Before Starting: Preparation and File Management
Efficient workflow begins long before you open any design software. When you download the bundle, take a few minutes to organize the four files into a dedicated folder named something like “HelloNinthGrade_BackToSchool.” If you work with multiple designs—for example, graduation themes, sports, or other grade levels—keeping a master library by theme saves time later. You can also add a short text document with notes on intended color palettes, product sizes, or licensing details if you sell the final items.
Check the file names: some bundles label the SVG and EPS as “design_name.svg” and “design_name.eps.” If you plan to edit the text or graphic elements, open the EPS in a vector application first to confirm which layers are editable. Many designers prefer starting with the EPS in Illustrator because it preserves complex paths and text outlines. For Silhouette users, the DXF file is often the most reliable, as Silhouette Studio handles DXF imports without extra plugins. Cricut users should open the SVG directly in Design Space, but note that text might appear as outlined paths if the original font is not installed. If you intend to change the wording later—say, to “Welcome Ninth Grade”—using the EPS in Illustrator gives you full font editing control.
Integration During the Design and Production Phase
The real value of the Hello Ninth Grade Back to School bundle becomes clear when you integrate it into your actual production steps. Below are three common scenarios, each showing how the file formats interact with specific tools and decisions.
Scenario 1: Vinyl Cutting for T‑Shirts or Decals
Preparation: Open the SVG in Cricut Design Space or the DXF in Silhouette Studio. Use the “Attach” function in Design Space to keep text and graphic layers together if they are separate. Because the design is likely a single color or layered, you can create a multi-layer cut by duplicating the design and deleting parts. For example, cut the text in black vinyl and a decorative star in gold, then layer them for a two-tone shirt.
Execution: Always test the scale on a sample piece of vinyl before cutting the final material. The vector format allows unlimited resizing, but check that your material size matches the project. For a standard t‑shirt, a width of 8–10 inches works well. For a mug, scale down to 3–4 inches. Use the PNG version as a visual reference for color placement if you are doing a multi-layer stack.
Quality Control: After cutting and weeding, check that the text details (especially the word “Ninth”) have not lost their negative spaces. If the counters in letters like “n” or “i” are too small, consider expanding the design slightly or simplifying the font. The EPS file can be used to modify the letter spacing (tracking) to improve legibility at small sizes.
Scenario 2: Print‑on‑Demand Products (Mugs, Cushions, Phone Cases)
Preparation: For print‑on‑demand, the 300 DPI transparent PNG is your primary asset. Upload it directly to your POD platform. The transparency allows the design to appear on any background color without a white box. If the product requires a specific print size, you can open the PNG in a photo editor like Photoshop or GIMP, adjust the canvas dimensions, and save a copy at the correct DPI (most platforms require 150–300 DPI).
Efficiency Tip: Because the PNG is high resolution, you can also use it as a placeholder while you generate mockups. Many POD platforms—like Printful, Printify, or Gelato—accept PNG with transparency for direct submission. If you want to add a shadow or an outline, do that in your editing software before uploading. The EPS can be converted to any other raster format if you need different dimensions or need to tweak the design for a specific product template.
Consistency: Keep the original PNG file unchanged as a backup. If you later decide to offer the design on a dark-colored product, open the EPS in Illustrator, invert the colors, and export a new white version. This maintains consistency across your product line without starting over.
Scenario 3: Digital Content and Social Media Graphics
After a Project: Even after you have produced physical items, the Hello Ninth Grade Back to School design can serve as a graphic for announcements, thank‑you cards, or social media posts. Use the PNG as a logo on a Facebook group or an Instagram story. The vector EPS allows you to create a full‑size poster or a flier for a school event. If you are a teacher or a PTA volunteer, you can print the design on cardstock and use it as a binder cover or a locker tag.
Long‑Term Use: Because the design is not tied to a specific year, it can be reused every back‑to‑school season with minor color changes. Store the EPS file in a cloud folder so you can edit the text later if you want to adapt it for other grades—for example, changing “Hello Ninth Grade” to “Hello Tenth Grade” or “Hello Freshman Year.” The editable nature of vector files makes this a sustainable asset.
Usability, Organization, and Compatibility Across Platforms
Understanding format compatibility saves time and reduces frustration. SVG files are best for Cricut and web use because they are standard XML. DXF files are often preferred by Silhouette users because the free version of Silhouette Studio does not import SVG natively. EPS files open in most professional vector editors, including Affinity Designer and Inkscape. The PNG serves as a universal fallback—any graphics program can open it. This means you can hand the design to a print shop, a contractor, or a team member without worrying about their software.
Preparation: Before your first project, verify that your software version can handle the file type. For example, older versions of Silhouette Studio (pre‑v4) may require a DXF version 14 or older. If you encounter compatibility issues, use a free online converter, but note that conversion can alter paths or colors. The bundle’s inclusion of all four formats reduces the need for conversion.
Organization: Label your production files clearly. For instance, “HelloNinthGrad_Shirt_SVG.svg” and “HelloNinthGrad_Mug_PNG.png” can help you quickly locate the correct asset when fulfilling an order. If you use a digital asset management system (or even a simple folder structure), tag the files with keywords like “back to school,” “ninth grade,” and “freshman.” This speeds up searching during busy seasons.
Efficiency: Create a master template in your design software that already has your product canvas size set (e.g., 12x12 inches for Cricut mats, 8x10 inches for mugs). Import the SVG or EPS into this template, scale it to the right size, and save it as a project file. Doing this once for each product type means you can replicate the same layout for future designs.
Practical Implementation Tips and Observations
- Test before production: Always run a small test cut or print on cheap materials. For vinyl, cut a small version on scrap. For POD, generate a sample order for yourself first. This helps catch color shifts, alignment issues, or missing details.
- Color management: The design is likely monochrome or uses simple colors. If you plan to print, convert the EPS to CMYK if your printer requires it, or keep it in RGB for digital printing. Many POD platforms expect RGB PNGs.
- Layering and grouping: When you open a vector file, examine the layer structure. If the text is separate from the decorative elements, you can easily change the phrase without redrawing everything.
- Font considerations: If the design uses a specific font and you don’t have it installed, the SVG may render as paths. That’s fine for cutting, but if you want to edit the text, use the EPS in a program that allows you to replace the font. Alternatively, trace the text from the PNG using a vector tool—but that is more work.
- Scaling for different products: A design that works on a t‑shirt at 10 inches wide will look different on a credit card holder at 2 inches. Use the PNG at 100% zoom to get a realistic preview of the level of detail at small sizes. If details blur, simplify the design using the EPS.
Long‑Term Value and Integration with Other Assets
The Hello Ninth Grade Back to School bundle is not a one‑time use item. As you build a library of seasonal designs, you can combine this asset with other elements—confetti, graduation caps, sports icons—to create fresh variations for different audiences. For example, pair the text with a school mascot SVG or add it to a custom calendar. Because the files are well‑structured and free of watermarks, they can be integrated into a larger branding system for a school supply shop or a tutoring service.
Business workflow example: A small business owner selling back‑to‑school bundles on Etsy can use this design as a core product. They create one listing with multiple variations: “Hello Ninth Grade” on a mug, on a key chain, and on a tote bag. Using the same vector source, they generate mockup images for each product. They then schedule social media posts with the PNG version. At the end of the season, they archive the EPS for next year, potentially updating the font or color to reflect new trends.
For educators and volunteers: If you are a teacher preparing a welcome bulletin board, the design can be scaled up to poster size. Print the PNG on a large‑format printer or cut the SVG from adhesive vinyl using a school’s cutting machine. The file’s high resolution ensures the letters remain crisp even at 24 inches wide.
Quality control in long‑term use: Digitally stored files can degrade if they are repeatedly converted. Keep the original bundle in its own folder and only work from copies. If you edit the EPS, save the edited version with a different filename. This preserves the original design for future projects where you might need the exact original layout.
In summary, the Hello Ninth Grade Back to School design bundle offers a versatile starting point for a wide range of creative and commercial projects. By understanding each file format’s role, preparing your workspace, and applying practical workflow steps, you can move from idea to finished product with confidence. Whether you are fulfilling a single custom order or building an entire product line, this asset saves you design time and gives you the flexibility to adapt to different mediums and platforms.